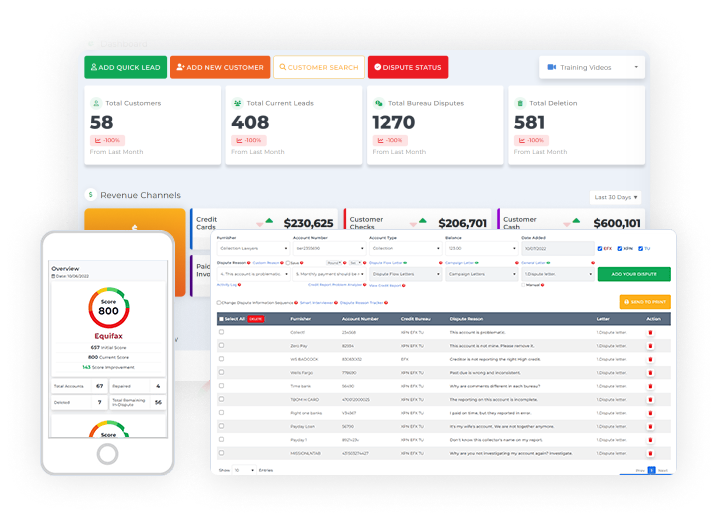
A smart interviewer is an automated process for you to be able to interview your client to better assess and understand the history of their accounts. It will also help you to know their feedback and insights about each account found in their credit report. It’s a good thing Client Dispute Manager Software has this feature to offer wherein you can gather your customer’s feedback fast using the smart interview feature.
If you’ve been in the credit repair industry for quite some time, you’ve probably done some interviews with your customers manually in the past. You interviewed them over the phone, set up a video call interview, or had a personal meeting with them. Doing any of these requires a lot of time, effort, and patience.
It is because most of the time your customers are on the go and busy with their stuff, just like you are. However, no matter how busy your customer is, interviewing them about their credit report is important. This is one of the best practices that you can use to understand what happened to each account and what strategy you can use in handling their disputes such as what reasons to put in their letters.
For you to save a lot of your time and your customers’ as well, Client Dispute Manager Software developed this feature, which we called the smart interviewer process. The smart interview is an automated process of interviewing your client.
How to use the Smart Interview inside the Client Dispute Manager Software?
Before sending the smart interview process to your customer, ensure you import their credit report first in the credit repair software.
To import your customer’s credit report, go to import reports/analysis.

If you don’t have the report yet either the analysis or the analyzer, click the dropdown for run analysis/analyzer to import the report of your customer.

Then select a client.

Click the dropdown for the report type to select which credit monitoring service your customer is using.

Note: The smart interviewer will only work if your customer is using any credit monitoring like SmartCredit, Identity IQ, myScoreIQ, and PrivacyGuard.
As soon as you’re done importing the credit report of your customer. You may now proceed to the customer screen.

Then use the search box to look for your customer.

Once you pull out the customer you’re looking for, ensure they are on active status before sending the smart interviewer. They will access the smart interviewer that you sent using their client tracking portal.

However, if the status of your customer is not active, you can simply click the dropdown on the status column and then change it to active.

Then a popup box will appear stating the client tracking portal login was sent to your customer.

Once you’re good with the status of your customer click the customer’s name.

Then you’ll be routed to the customer’s profile where you can see the smart interviewer and then click the box to send it to your customer.

A popup box will appear stating that the smart interview will only show once your customer logs into the client tracking portal.

Once your customer login to their client tracking portal.
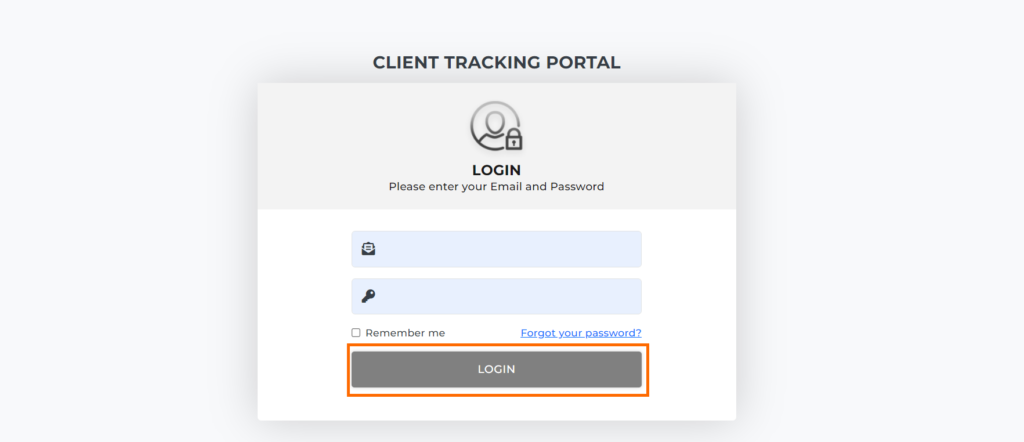
The first thing that they will see is the smart interviewer popup and then they need to click start the interview for them to begin the automated interview process.

Once they start the interview, they will go through 3 different steps: account explanation, document, and review & finish.
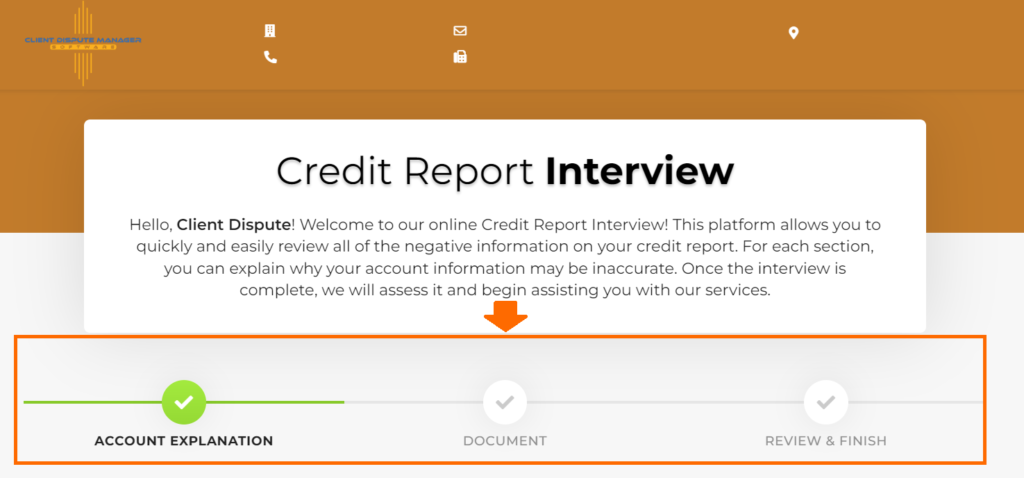
1st Step: Account Explanation
In the account explanation, your customer will be able to go through each account and they can put their explanation if they found any inconsistencies.
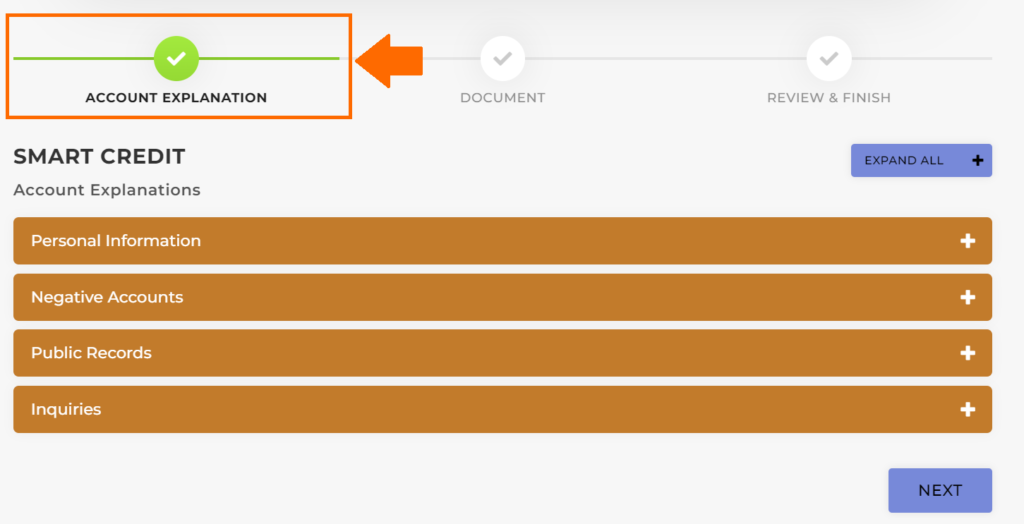
Your customer needs to click the “+” sign to check the accounts and put their explanation if they found any discrepancies under personal information, negative accounts, public records, and inquiries.
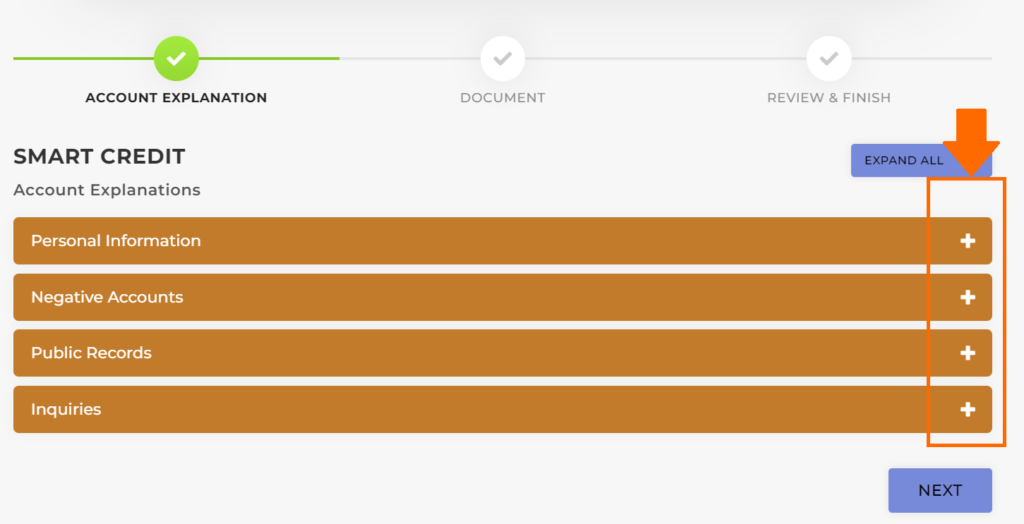
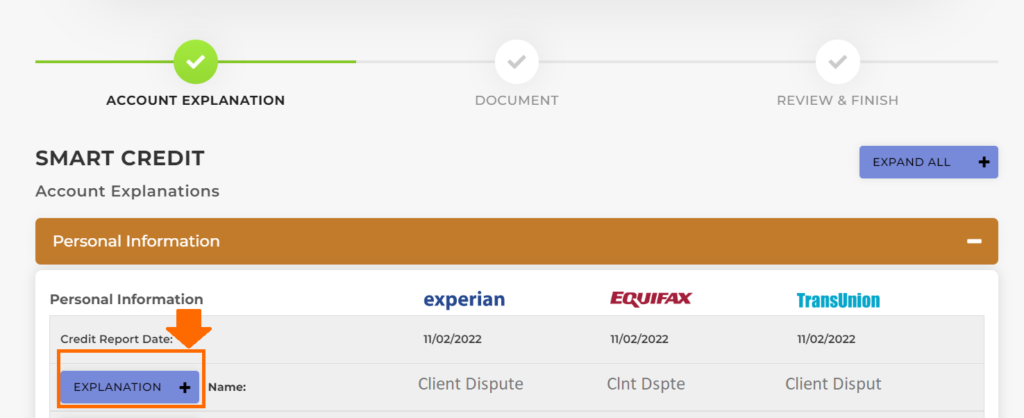
For example, under personal information, if your customer found wrong information under his/her name just simply click the explanation.
Next, your customer can put his/her explanation inside the text box and click save.
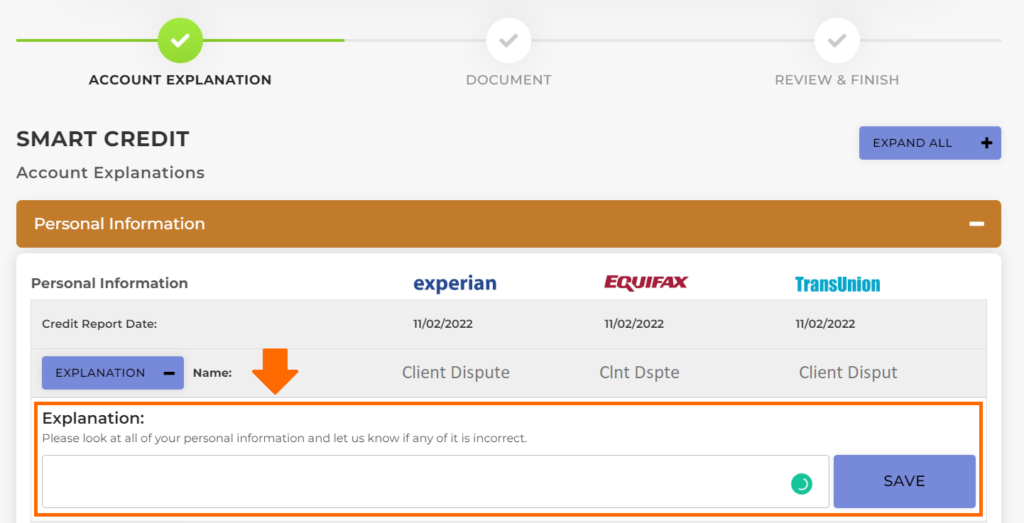
Same process as well when it comes to providing explanations for negative accounts, public records, and inquiries. Once your customer is done with his/her explanations of the discrepancies found. He/She may now proceed with the next step.
2nd Step: Document
In the document section, your customer can upload any document to support the explanation they provided. They will be able to provide any documents related to the explanation they provided.
Note: Maximum file upload is 50MB.
Formats supported: .doc, .docx, .jpg, .png, .pdf

For example, under personal information, if they explained to correct certain information, they can upload proof as a supporting document by clicking the browse & upload.
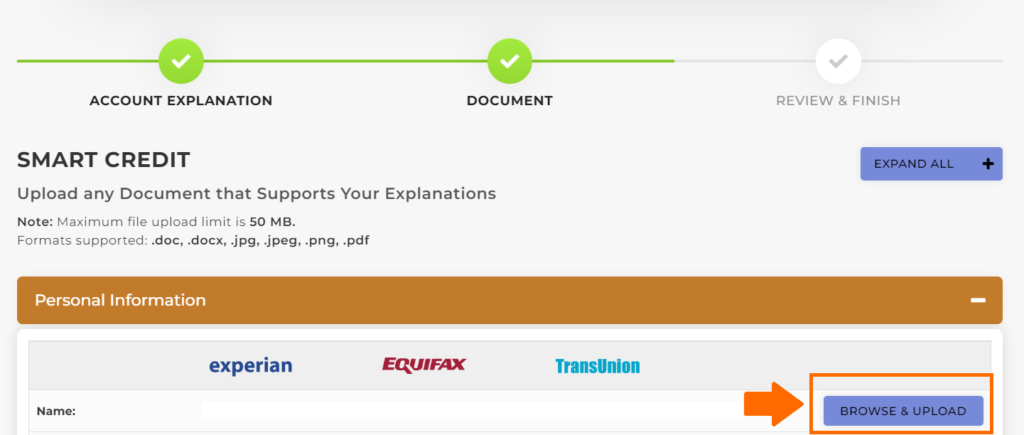
After your customer uploads all the documents he/she may now proceed to the last step.
3rd Step: Review & Finish
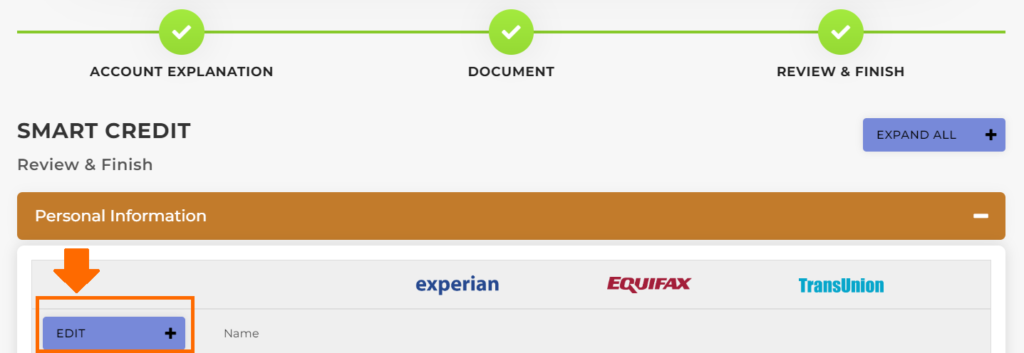
In the review and finish screen, this is where your customer can review thoroughly the information they provided.

Click the edit button if your customer wants to make some changes to his/her explanation or documents uploaded.
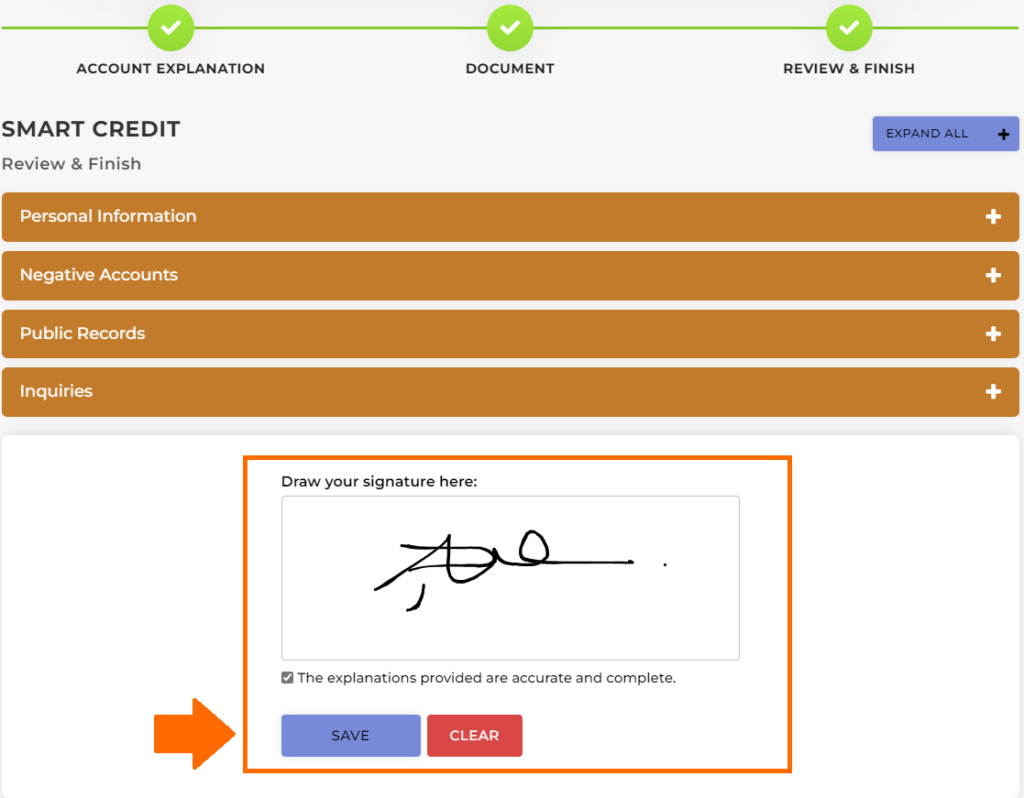
Once your customer is all good with all the information and documents provided. Then go to the box below for your customer to draw their signature then click save.
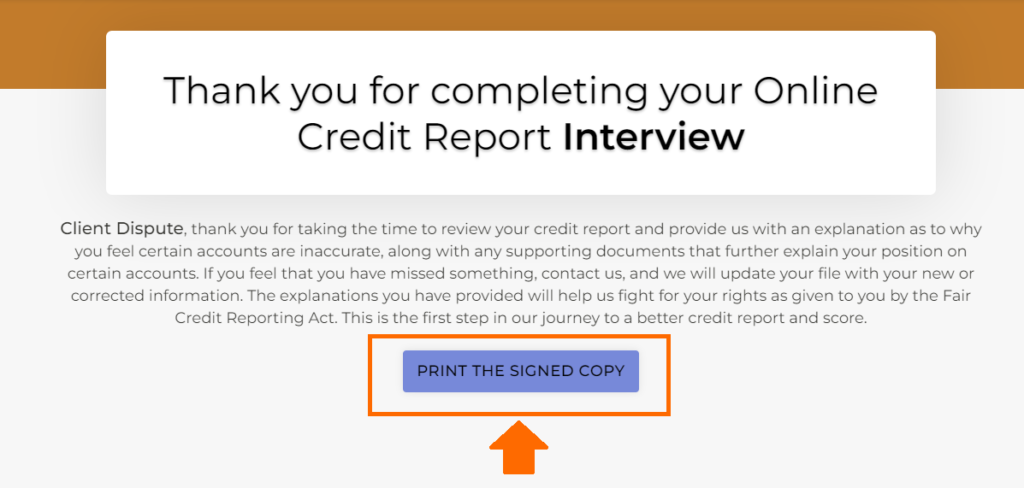
That’s the end of the smart interviewer your customer can now print the signed copy for his/her reference from the best credit repair software.
You’ll receive a notification inside the best credit repair software once your customer is done with the smart interviewer.

Then you’ll be routed to the customer’s screen who finished the smart interviewer. Click the customer’s name.

On your customer’s profile, you’ll see the notification for the smart interviewer icon.

Once you clicked the icon, you’ll see the status of the smart interviewer, and click the view icon to see the results of the interview.
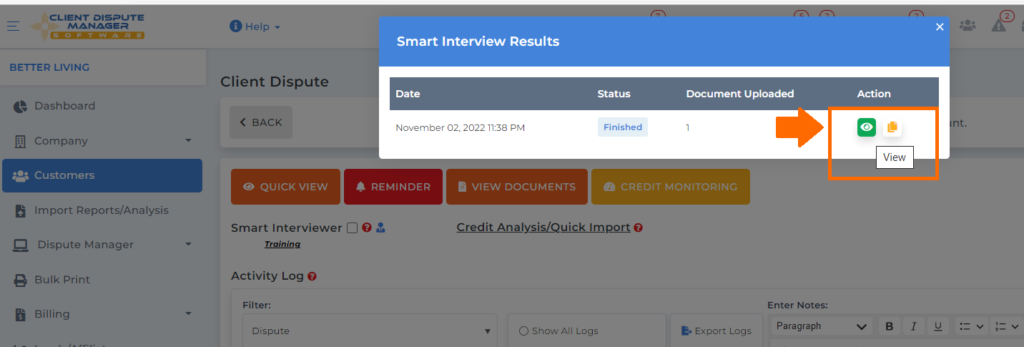
In the smart interviewer results, you’ll see the explanation of your customer under the explanation section that you can use in doing your dispute letters on Client Dispute Manager Software.

To start doing your disputes and use the explanation your customer provided on the smart interviewer, go back to the customer’s information then click the dispute green button.

You’ll be routed to the dispute manager screen. If you will create a dispute under credit bureaus, creditors, and collectors you’ll see the smart interviewer click that so you can use it in doing your disputes.

And a popup box will appear showing the smart interviewer results.

The smart interviewer is a great feature but make sure to review the interview your customer filled out because it would help you a lot to create a strategy that you can use to create a good dispute letter using the best credit repair software.
Bonus: Now that you have read this article, why not take your new skill and start your own credit business helping others? We have free training that can help you do just that.
Click here to learn more.


