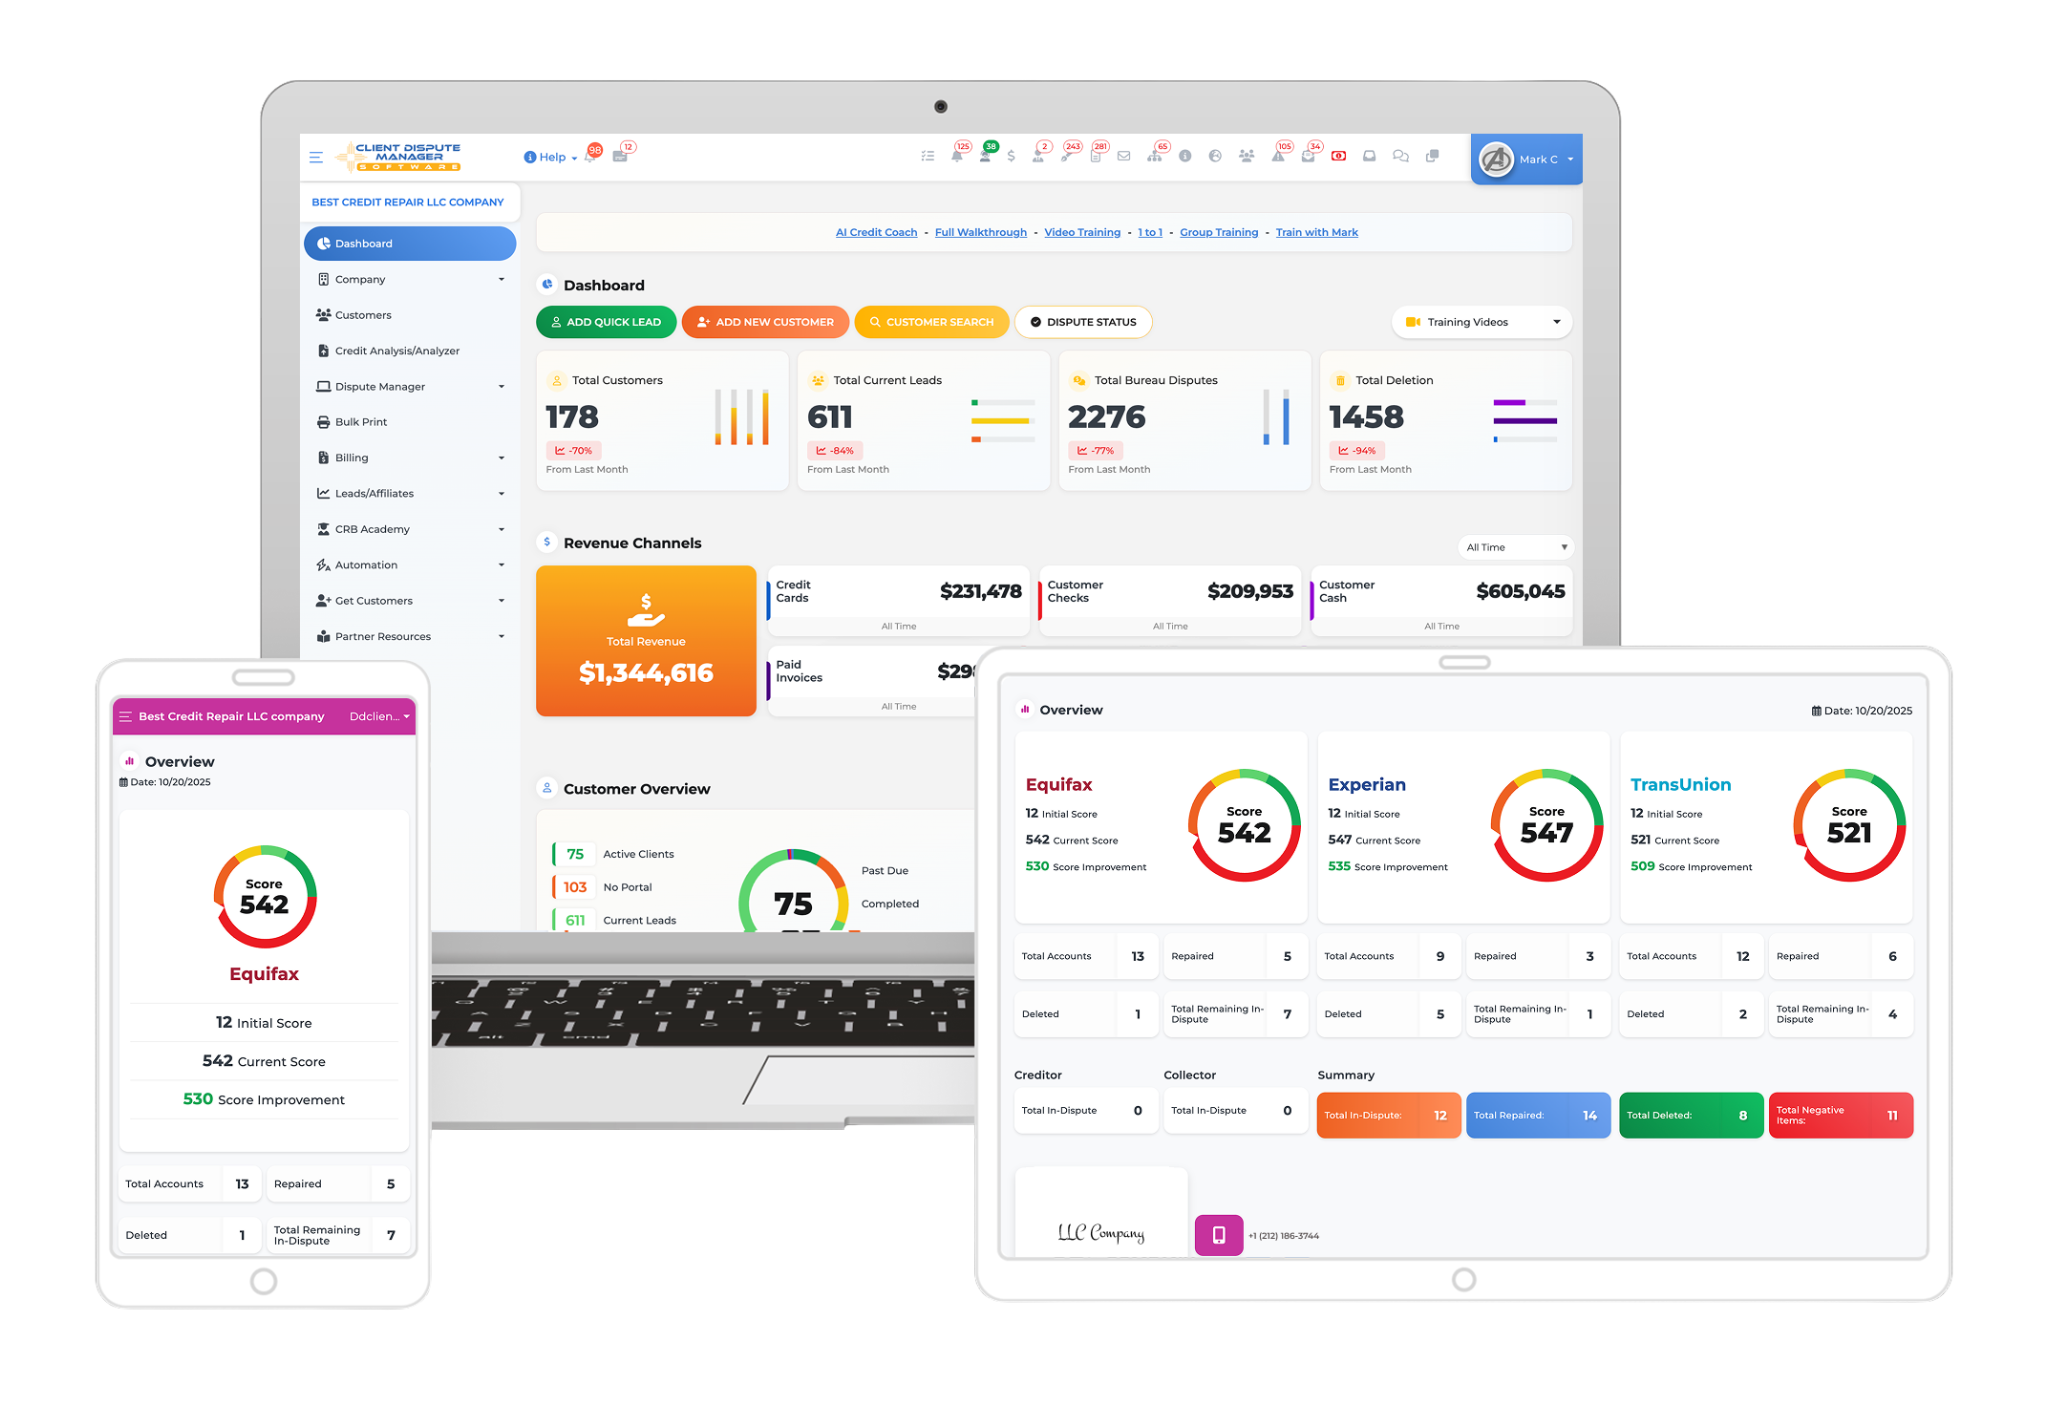
Client auto sign up is an automated way of onboarding your customers on Client Dispute Manager Software. You’ll be able to get all the information and documents that you need from them to start doing disputes for them.
If you’re tired of being on the phone with your customer conducting an interview for a long period of time or driving miles away to personally meet them to get all the details you need from them, then this client auto signup feature is perfect for you. Not only will it save much of your time but, most importantly, it will also save your customers’ time.
How does client auto signup work inside Client Dispute Manager Software?
For your customer to go through the client auto signup you need to send them the contract first inside the credit repair software. It is because the contract goes along with the client auto signup.
Before you send the contract, make sure that the client auto signup is turned on.
To check, go to the company tab then click client auto signup.

Make sure that client auto signup process is on.

Now, once you’re all good, you can send the contract to your customer.
Go to the customers screen.

Using the search box to look for your customer.

Once you pulled out your customer’s info, go to the send email column.

Then click the yellow envelope to see the contracts.

A popup box will appear. Click contract agreement templates.

Select a contract then click the send mail icon.

An email contract will be sent to your customer’s email. You need to ask your customer to check their email to find the contract and for them to go through the client auto signup.
Your customer will be receiving an email like the one below.
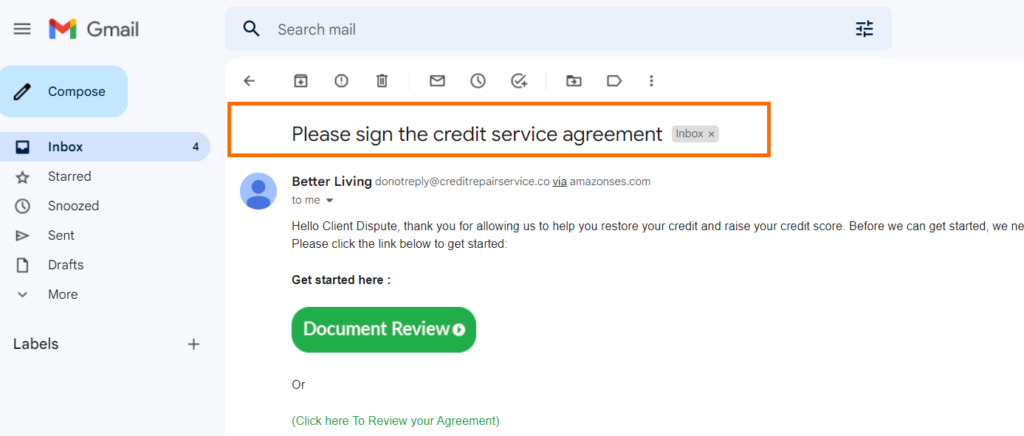
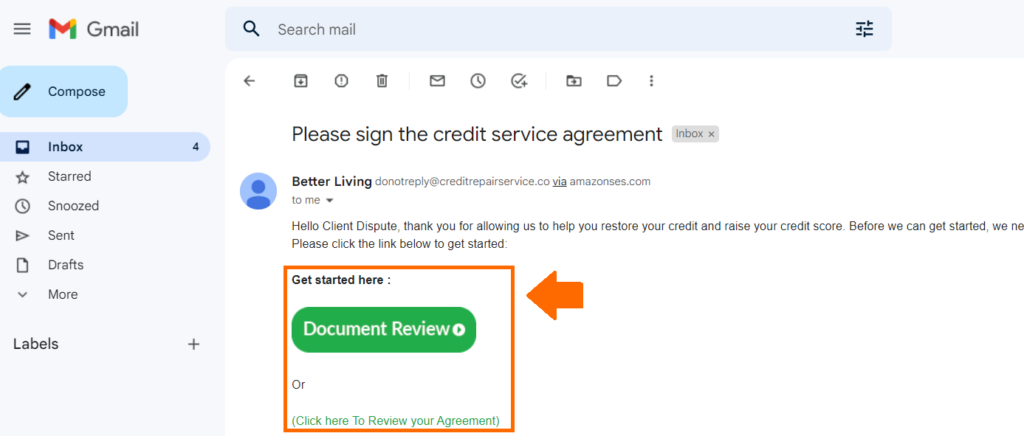
To get started, your customer needs to click the document review or the link to review the agreement.
Once they click it, they will be routed to the client auto signup process and the first thing that they will see would be the welcome screen.
In the welcome screen, they will see all the different steps that they need to accomplish.
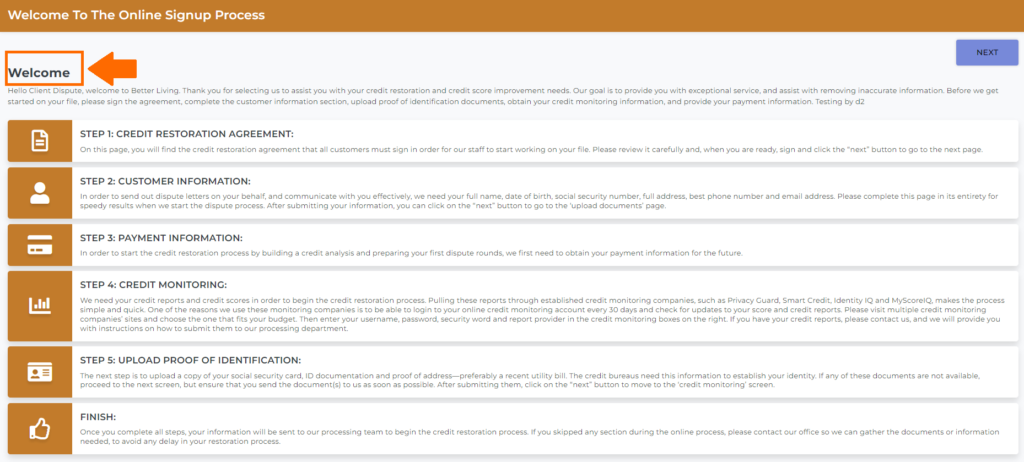
Once they’re done, click the next button to proceed with the 1st step for the client auto signup.

STEP 1: CREDIT RESTORATION AGREEMENT
On this page, your customer will be able to review the agreement and sign it so you can start working on his/her file.
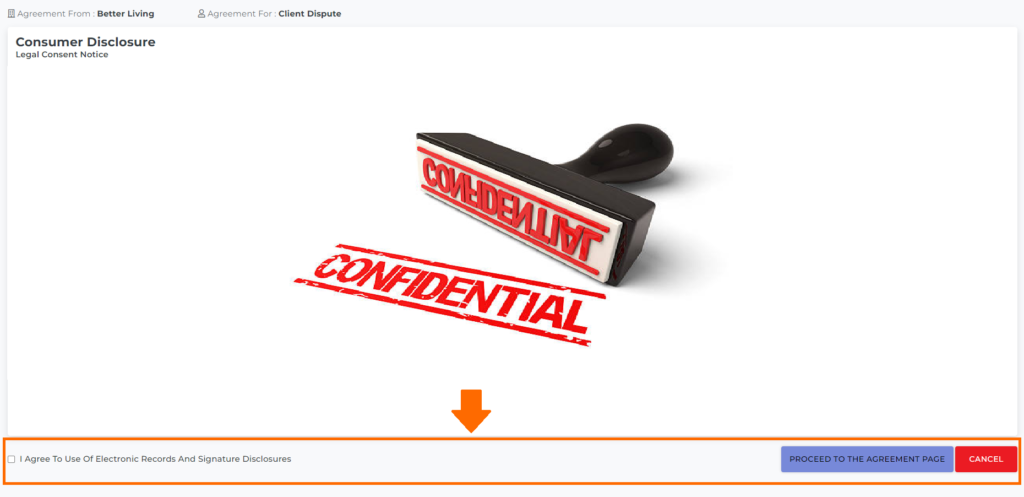
The first page of the agreement is the consumer disclosure. Check the box that he/she agrees to and click proceed to the agreement page.
The next page would be the disclosure details.

Your customer needs to fill out his/her name inside the enter your name box.

Then draw their signature inside the box.

Lastly, check the box and click submit signature.

The next page would be the contract details that they need to read and review carefully.

After checking the contract, they need to enter their name and draw their signature under digital signature.

Lastly, check the box and click submit signature to proceed with the 2nd step.

STEP 2: CUSTOMER INFORMATION
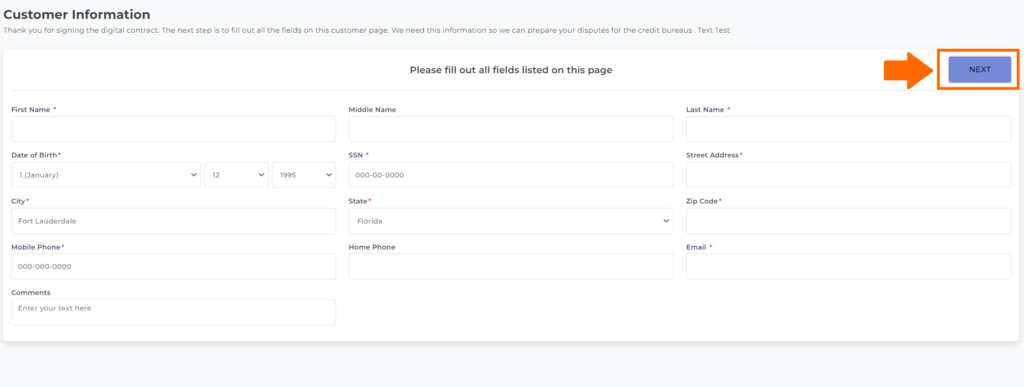
The next step is pretty straightforward as your customer just have to fill out all the information needed in order for you to send out dispute letters on their behalf.
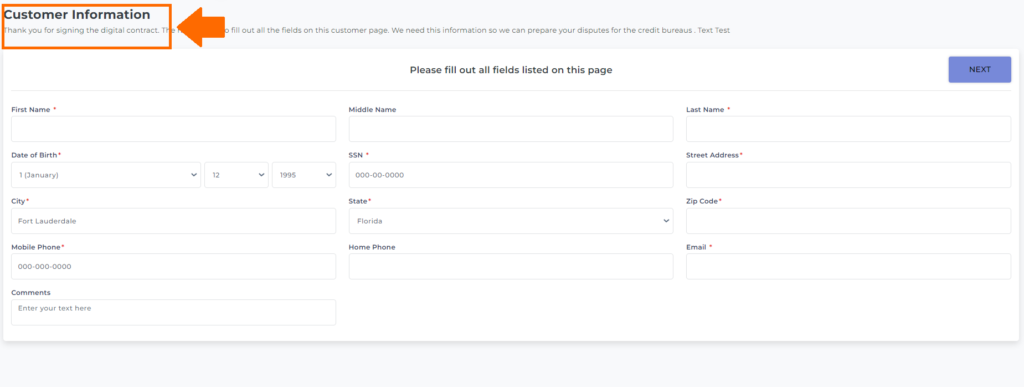
Once done click the next button to proceed with the 3rd step.
Start a credit business today. Click to learn more.
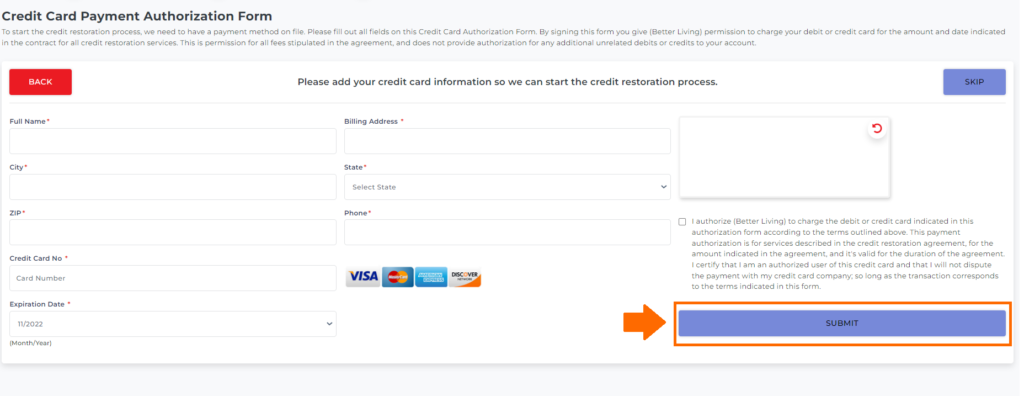
STEP 3: PAYMENT INFORMATION
This page is where your customer will give you their payment information and the authority to charge their card for their future payment.
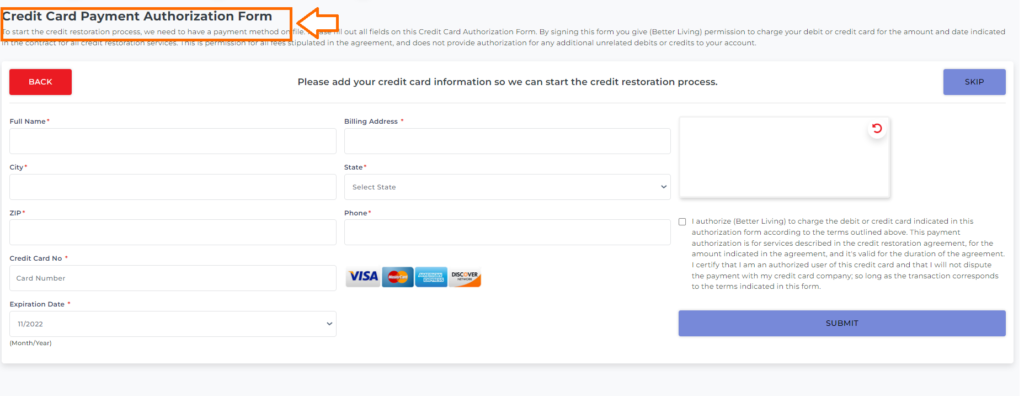
Note: For you to accept card payments inside the software you must need to set up first your authorize.net and integrate it inside the Client Dispute Manager Software.
Once done click the submit button to proceed to the 4th step.
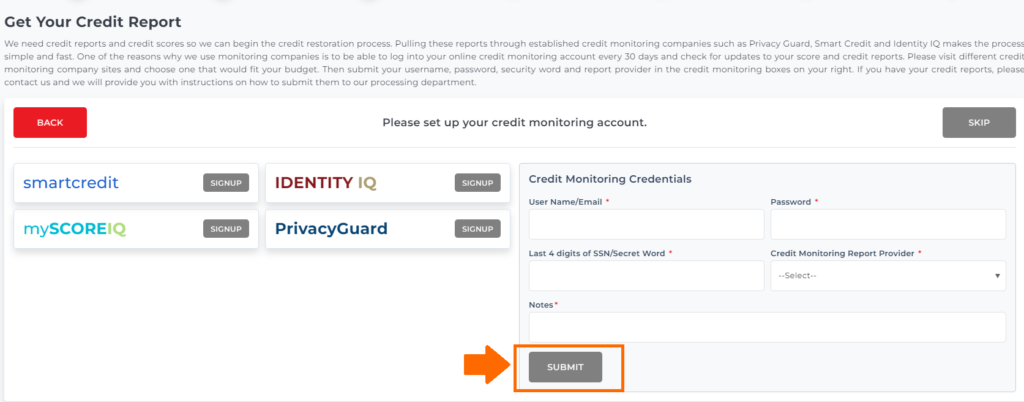
STEP 4: CREDIT MONITORING
For you to begin with the credit restoration process you’ll be the needing the credit monitoring credentials of your customer to check their credit reports and credit scores.
On this page, your customer needs to put their credit monitoring credentials.
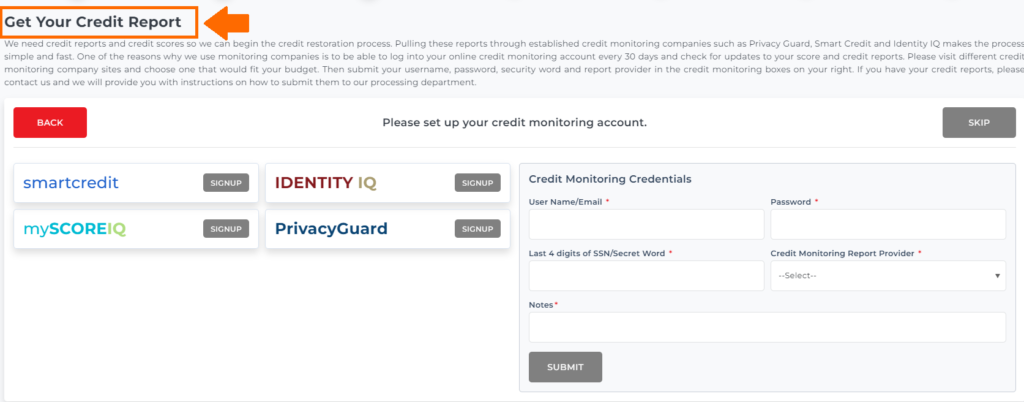
If your customer doesn’t have a credit monitoring service yet they can choose among the 4 credit monitoring services that are compatible with the Client Dispute Manager Software and click signup.
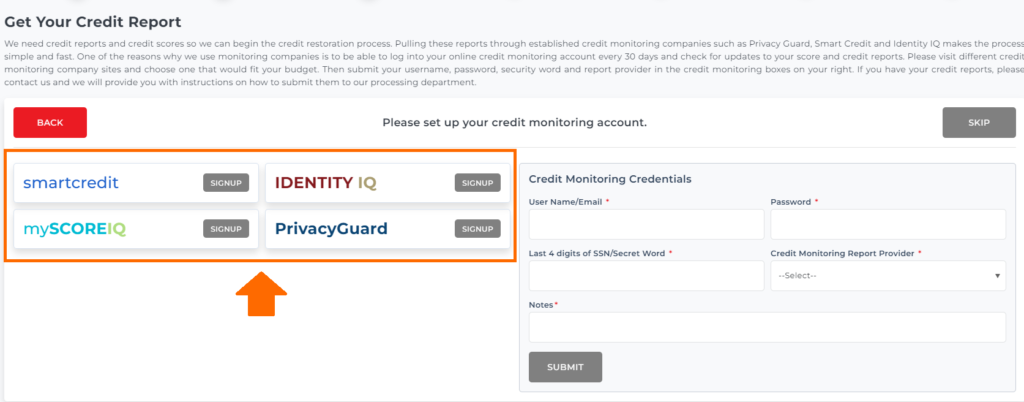
Note: As of the moment there are 4 credit monitoring services that are compatible with the credit repair software: Smart credit, Identity IQ, my Score IQ, and Privacy Guard.
If your customer has an existing credit monitoring service already, he/she can directly put his/her credentials under credit monitoring credentials.
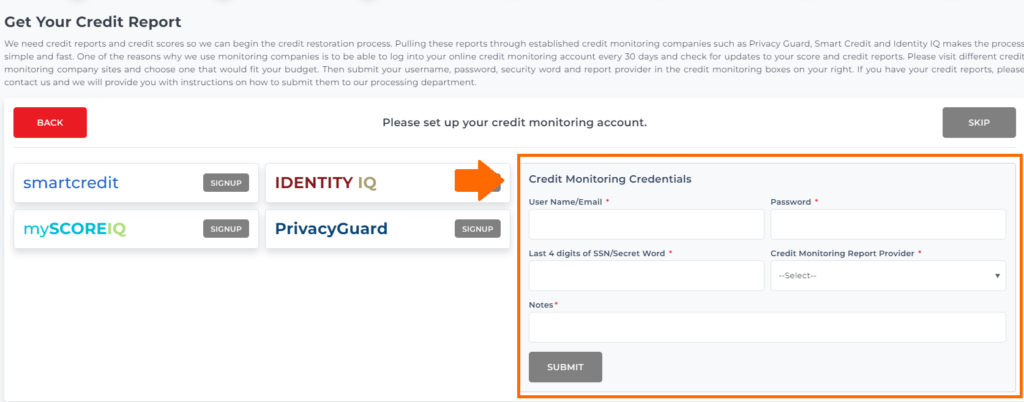
Next, click the submit button once done to proceed with the 5th step.
STEP 5: UPLOAD PROOF OF IDENTIFICATION
The next step is for your customer to upload a copy of his/her documents. These could be a copy of social security card, ID documentation, and proof of address.

Under the proof/document type click the dropdown to choose what document you’ll be uploading.

Click the select a file to upload the document inside the credit repair software.

Then click save.

Under proof of identification table, you can download, delete, and preview the document you uploaded for double-checking.

Click the next button to proceed with the last step.

STEP 6: FINISH
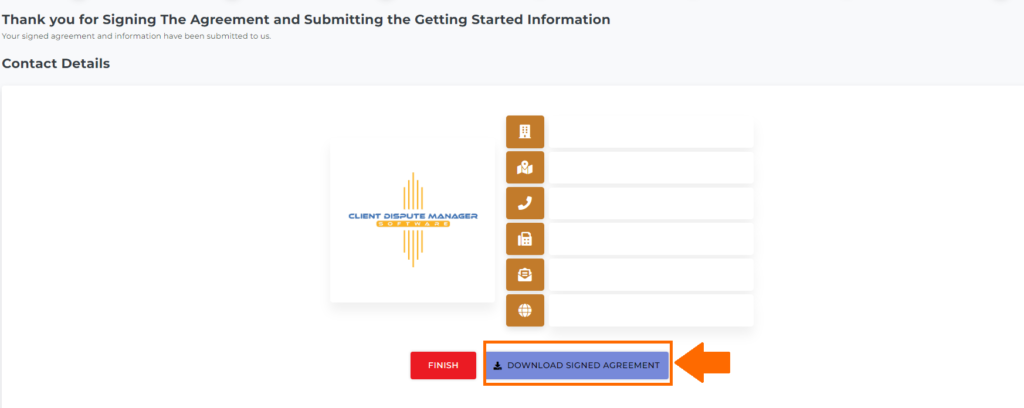
The last page of the client auto signup will be a thank you note wherein your customer will be able to download the signed agreement on his/her end and see your contract details.
Once your customer has finished the client auto signup, review everything thoroughly to make sure that all the information that they entered is correct so you can start handling their disputes.
Bonus: Now that you have read this article, why not take your new skill and start your own credit business helping others? We have free training that can help you do just that.
Click here to learn more.


