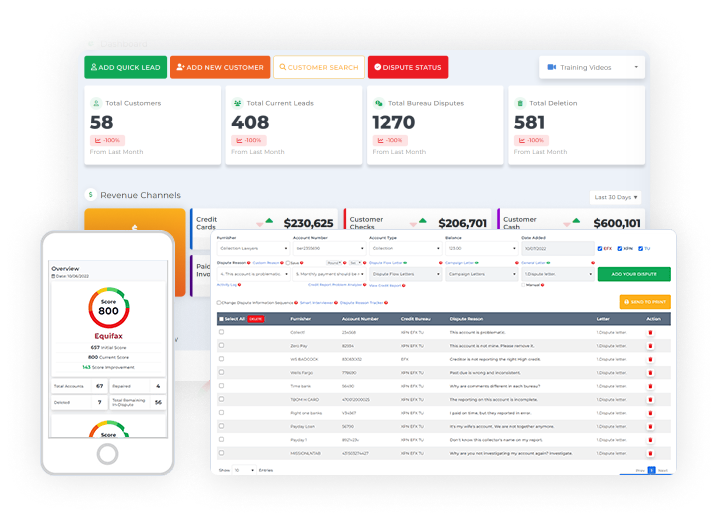
The add item screen in the Client Dispute Manager Software is where you can locate all the negative accounts you imported from your customer’s credit monitoring. This is also where you can organize which account you’ll be working on to initiate any disputes.
Allowing you to organize the accounts makes everything easier. This will provide you with time to plan and decide how you will prepare your disputes.
Our credit repair software does not only provide tools to build disputes, but it also allows you to manage your time and complete your tasks.
To go to the add item screen, go to the Dispute Manager tab.

Select the specific customer you’ll be working on.

Click add item.

How To Import Credit Reports To The Add Item Screen of the Client Dispute Manager Software?
There are 2 ways for you to import the credit report of your customer to the add item screen:
1. Doing It Manually
2. Importing The Report
1. Doing It Manually
Type the furnisher’s name.

Then the account number.

Choose what type of account you’re trying to add.
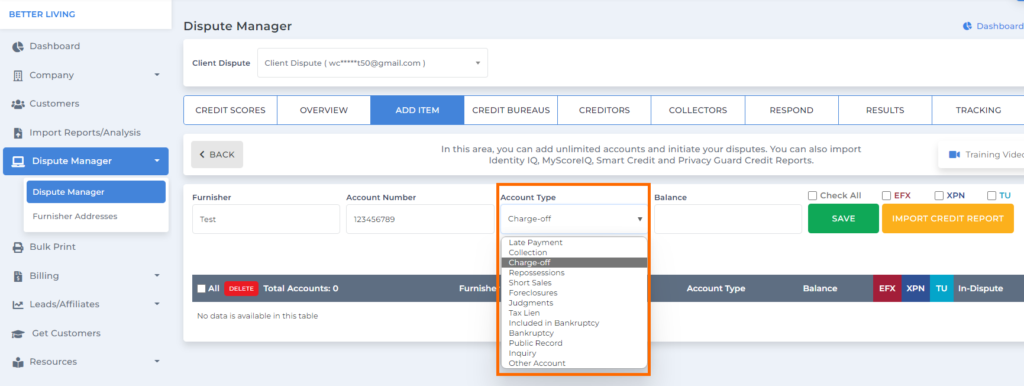
Add the amount if there’s a balance.

Select which credit bureau it is reflecting, then click save.

Once you click save it would be added to the grid and will be ready for dispute.

2. Importing The Report
The easiest way to add the negative accounts on the add item screen in the credit repair software is via Importing The Report From Your Customer Credit Monitoring. This one will only work if you have your customer’s credit monitoring credentials inside the Client Dispute Manager Software.
Go to the Add Item screen.

Then click Import Credit Report.

You’ll be routed to the Credit Importer screen. Select the report type (the credit monitoring service of your customer)

Then click Quick Import.

You can always check the training videos that we have on the Add Item screen for your reference.

Once you’re done importing the report, either you did it manually or through Quick Import, you can now freely choose which account/s you are ready to work on.
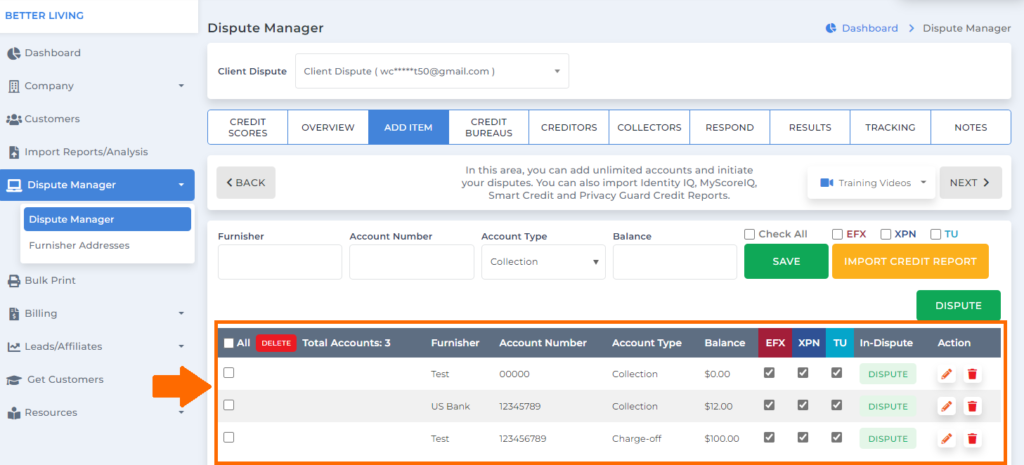
To start doing your dispute for credit bureaus, creditors, and collectors: Click the box to select which account/s you would like to dispute.
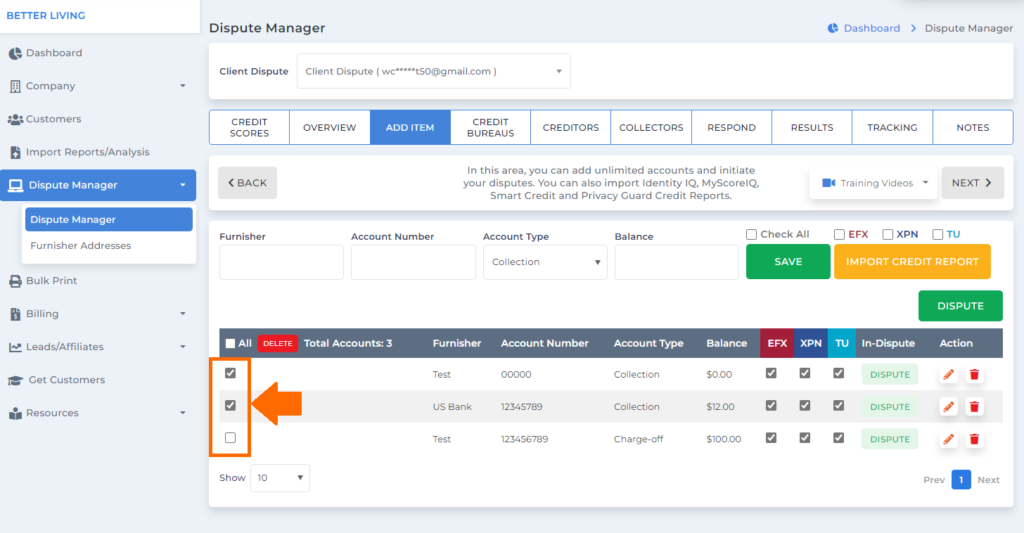
Once you’re done selecting the accounts, click on the Dispute icon.
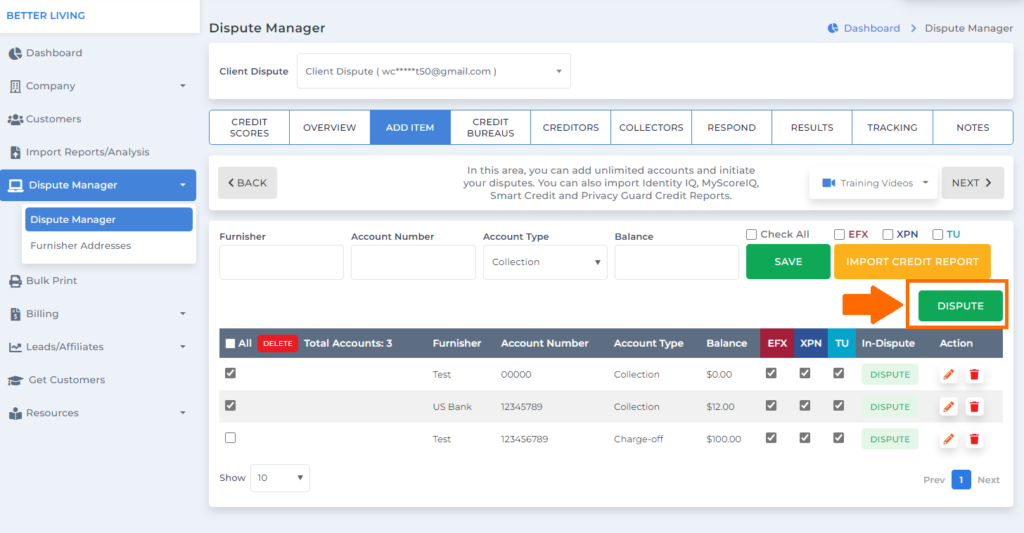
Make sure that the status changes from Dispute to In-Dispute.
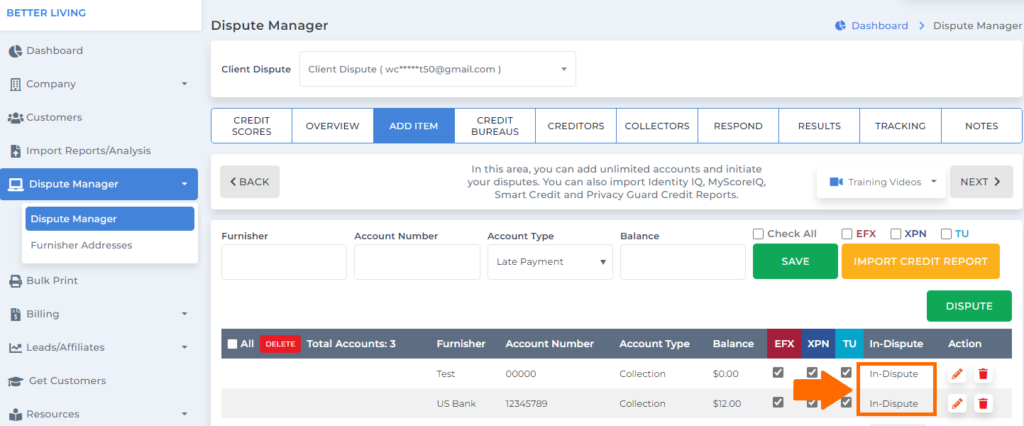
Now it’s time to build your disputes for the credit Bureaus, creditors, and collectors.
Bonus: Now that you have read this article, why not take your new skill and start your own credit business helping others? We have free training that can help you do just that. Click here to learn more.


